



THE WRITER’S GUIDE · 08 / 14
Tagging & Production Reports
Turn what is on the page into a useful breakdown.
In this chapter
Two kinds of automation
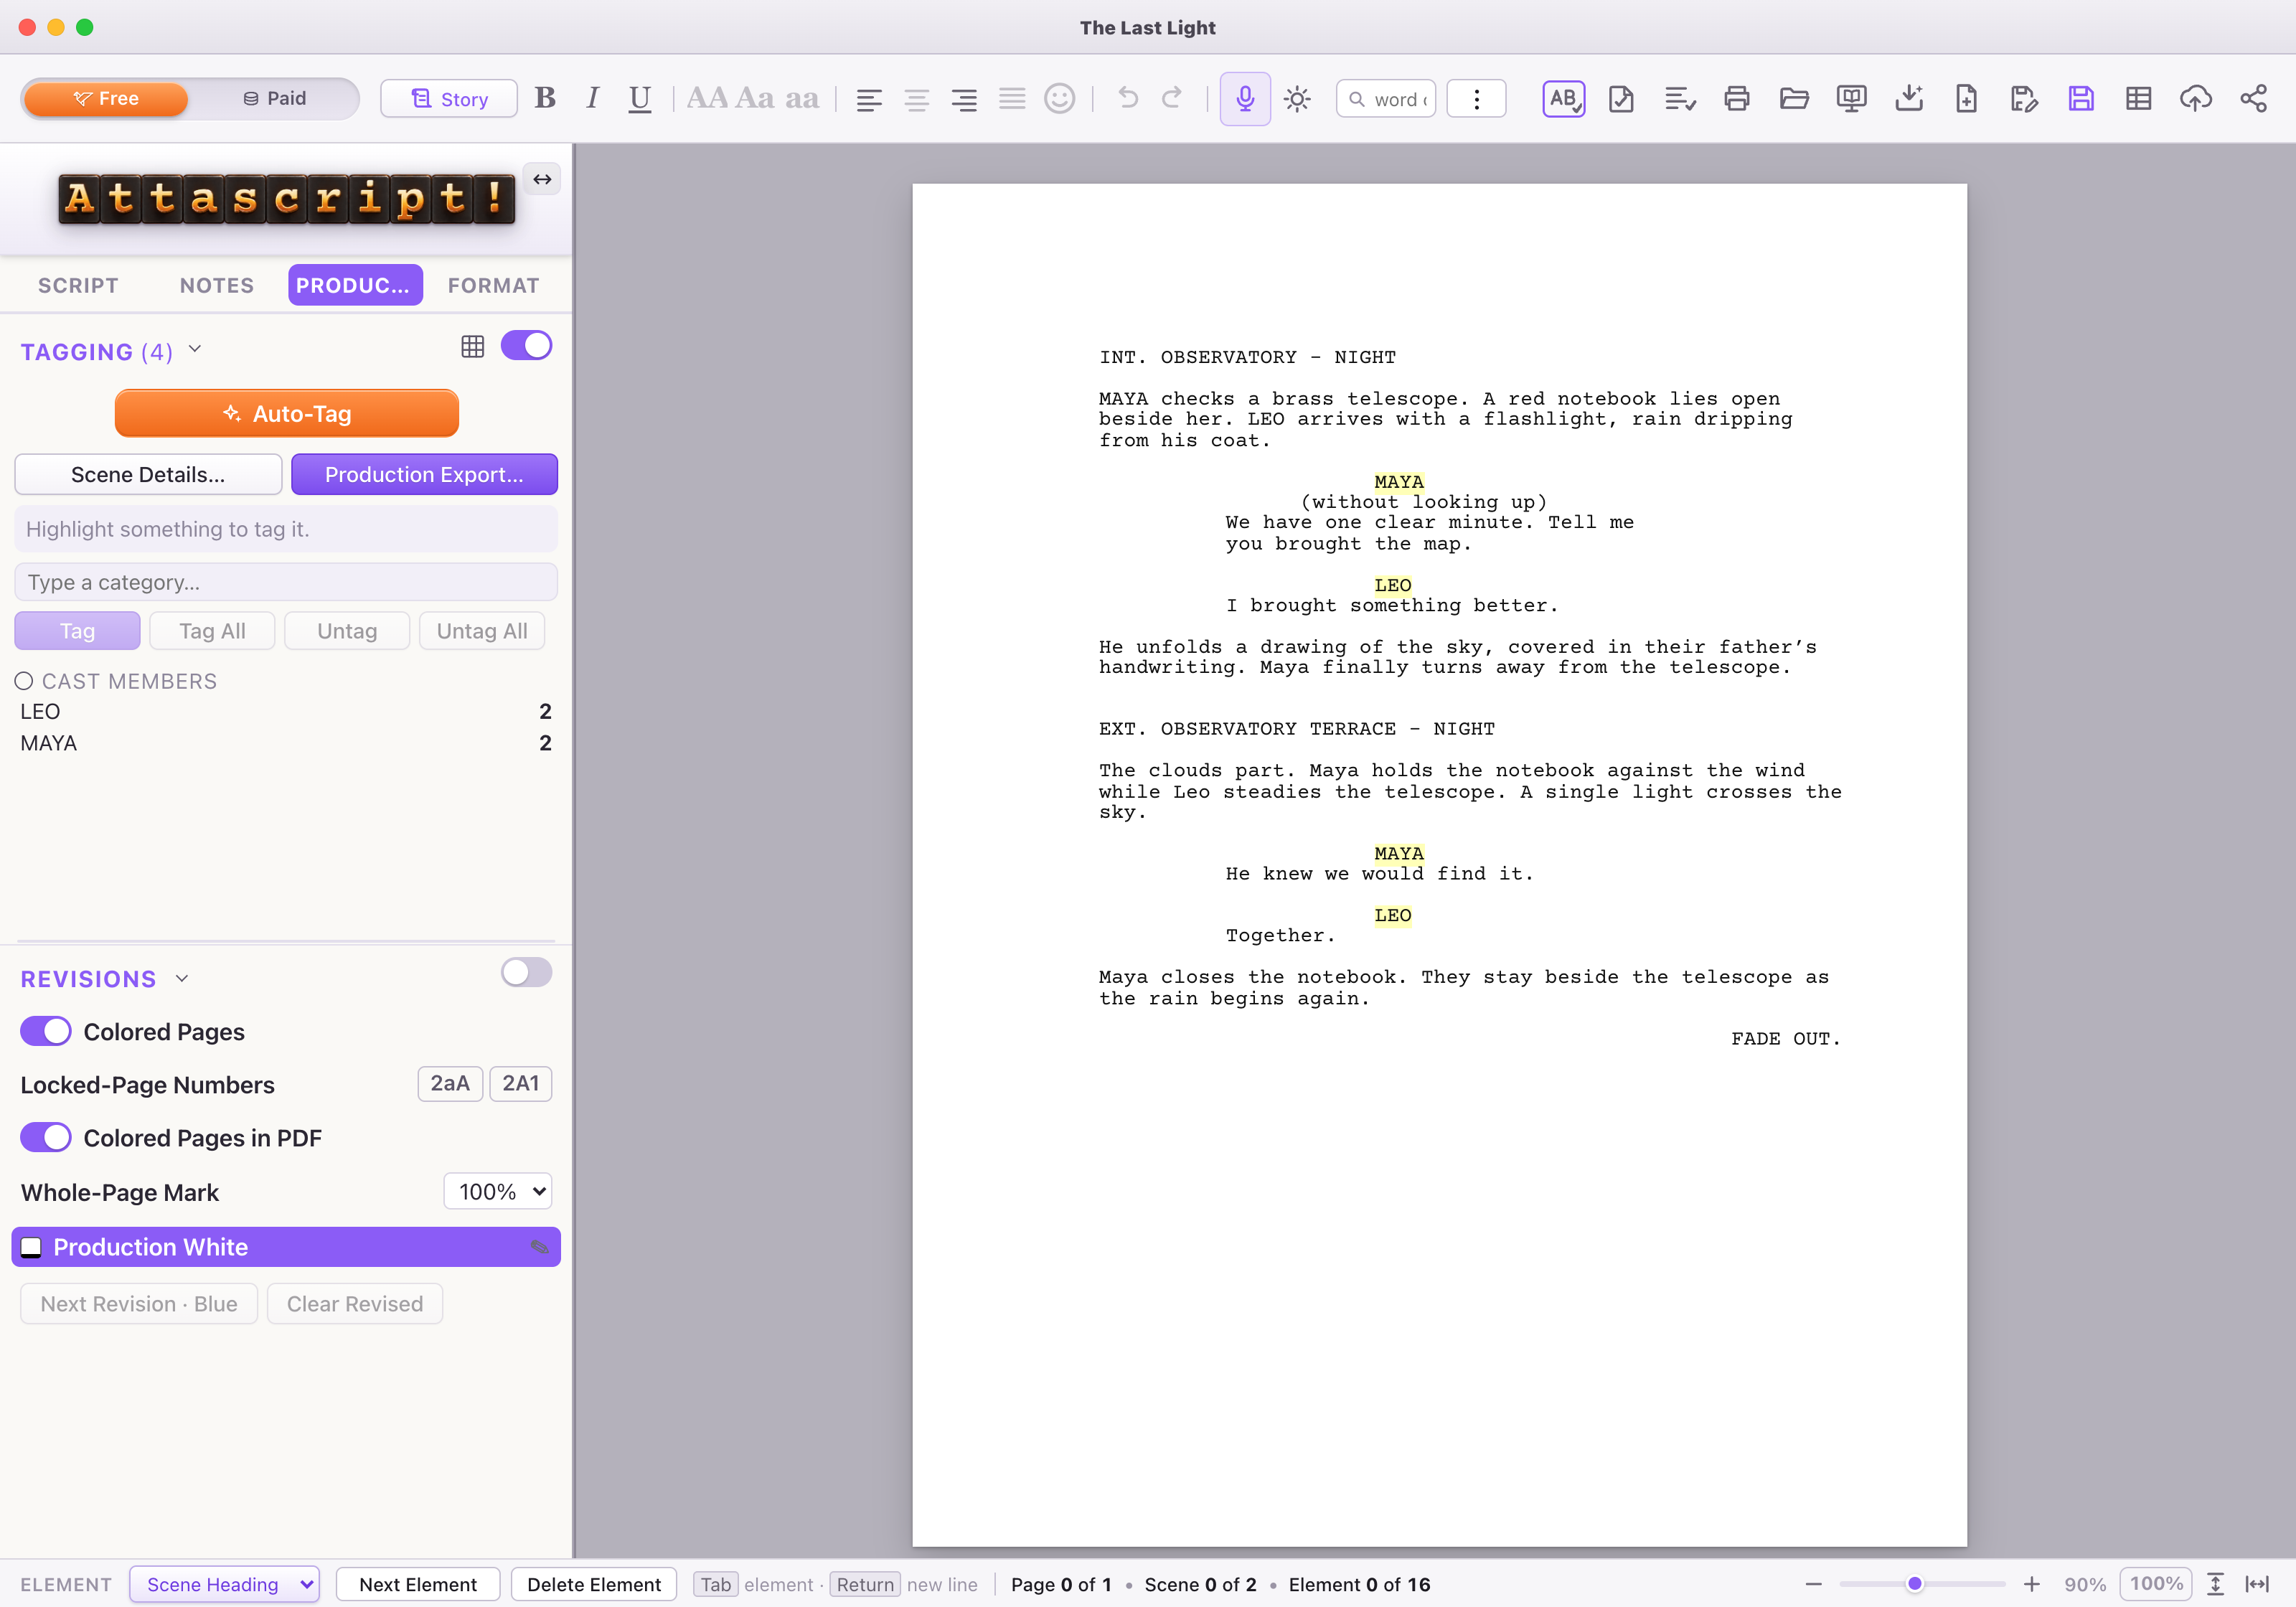
Open the Production tab and switch on Tagging Mode. The app can automatically tag recognized character names: characters who speak belong to Cast Members; non-speaking characters can belong to Background Actors. This local character tagging does not need an AI request.
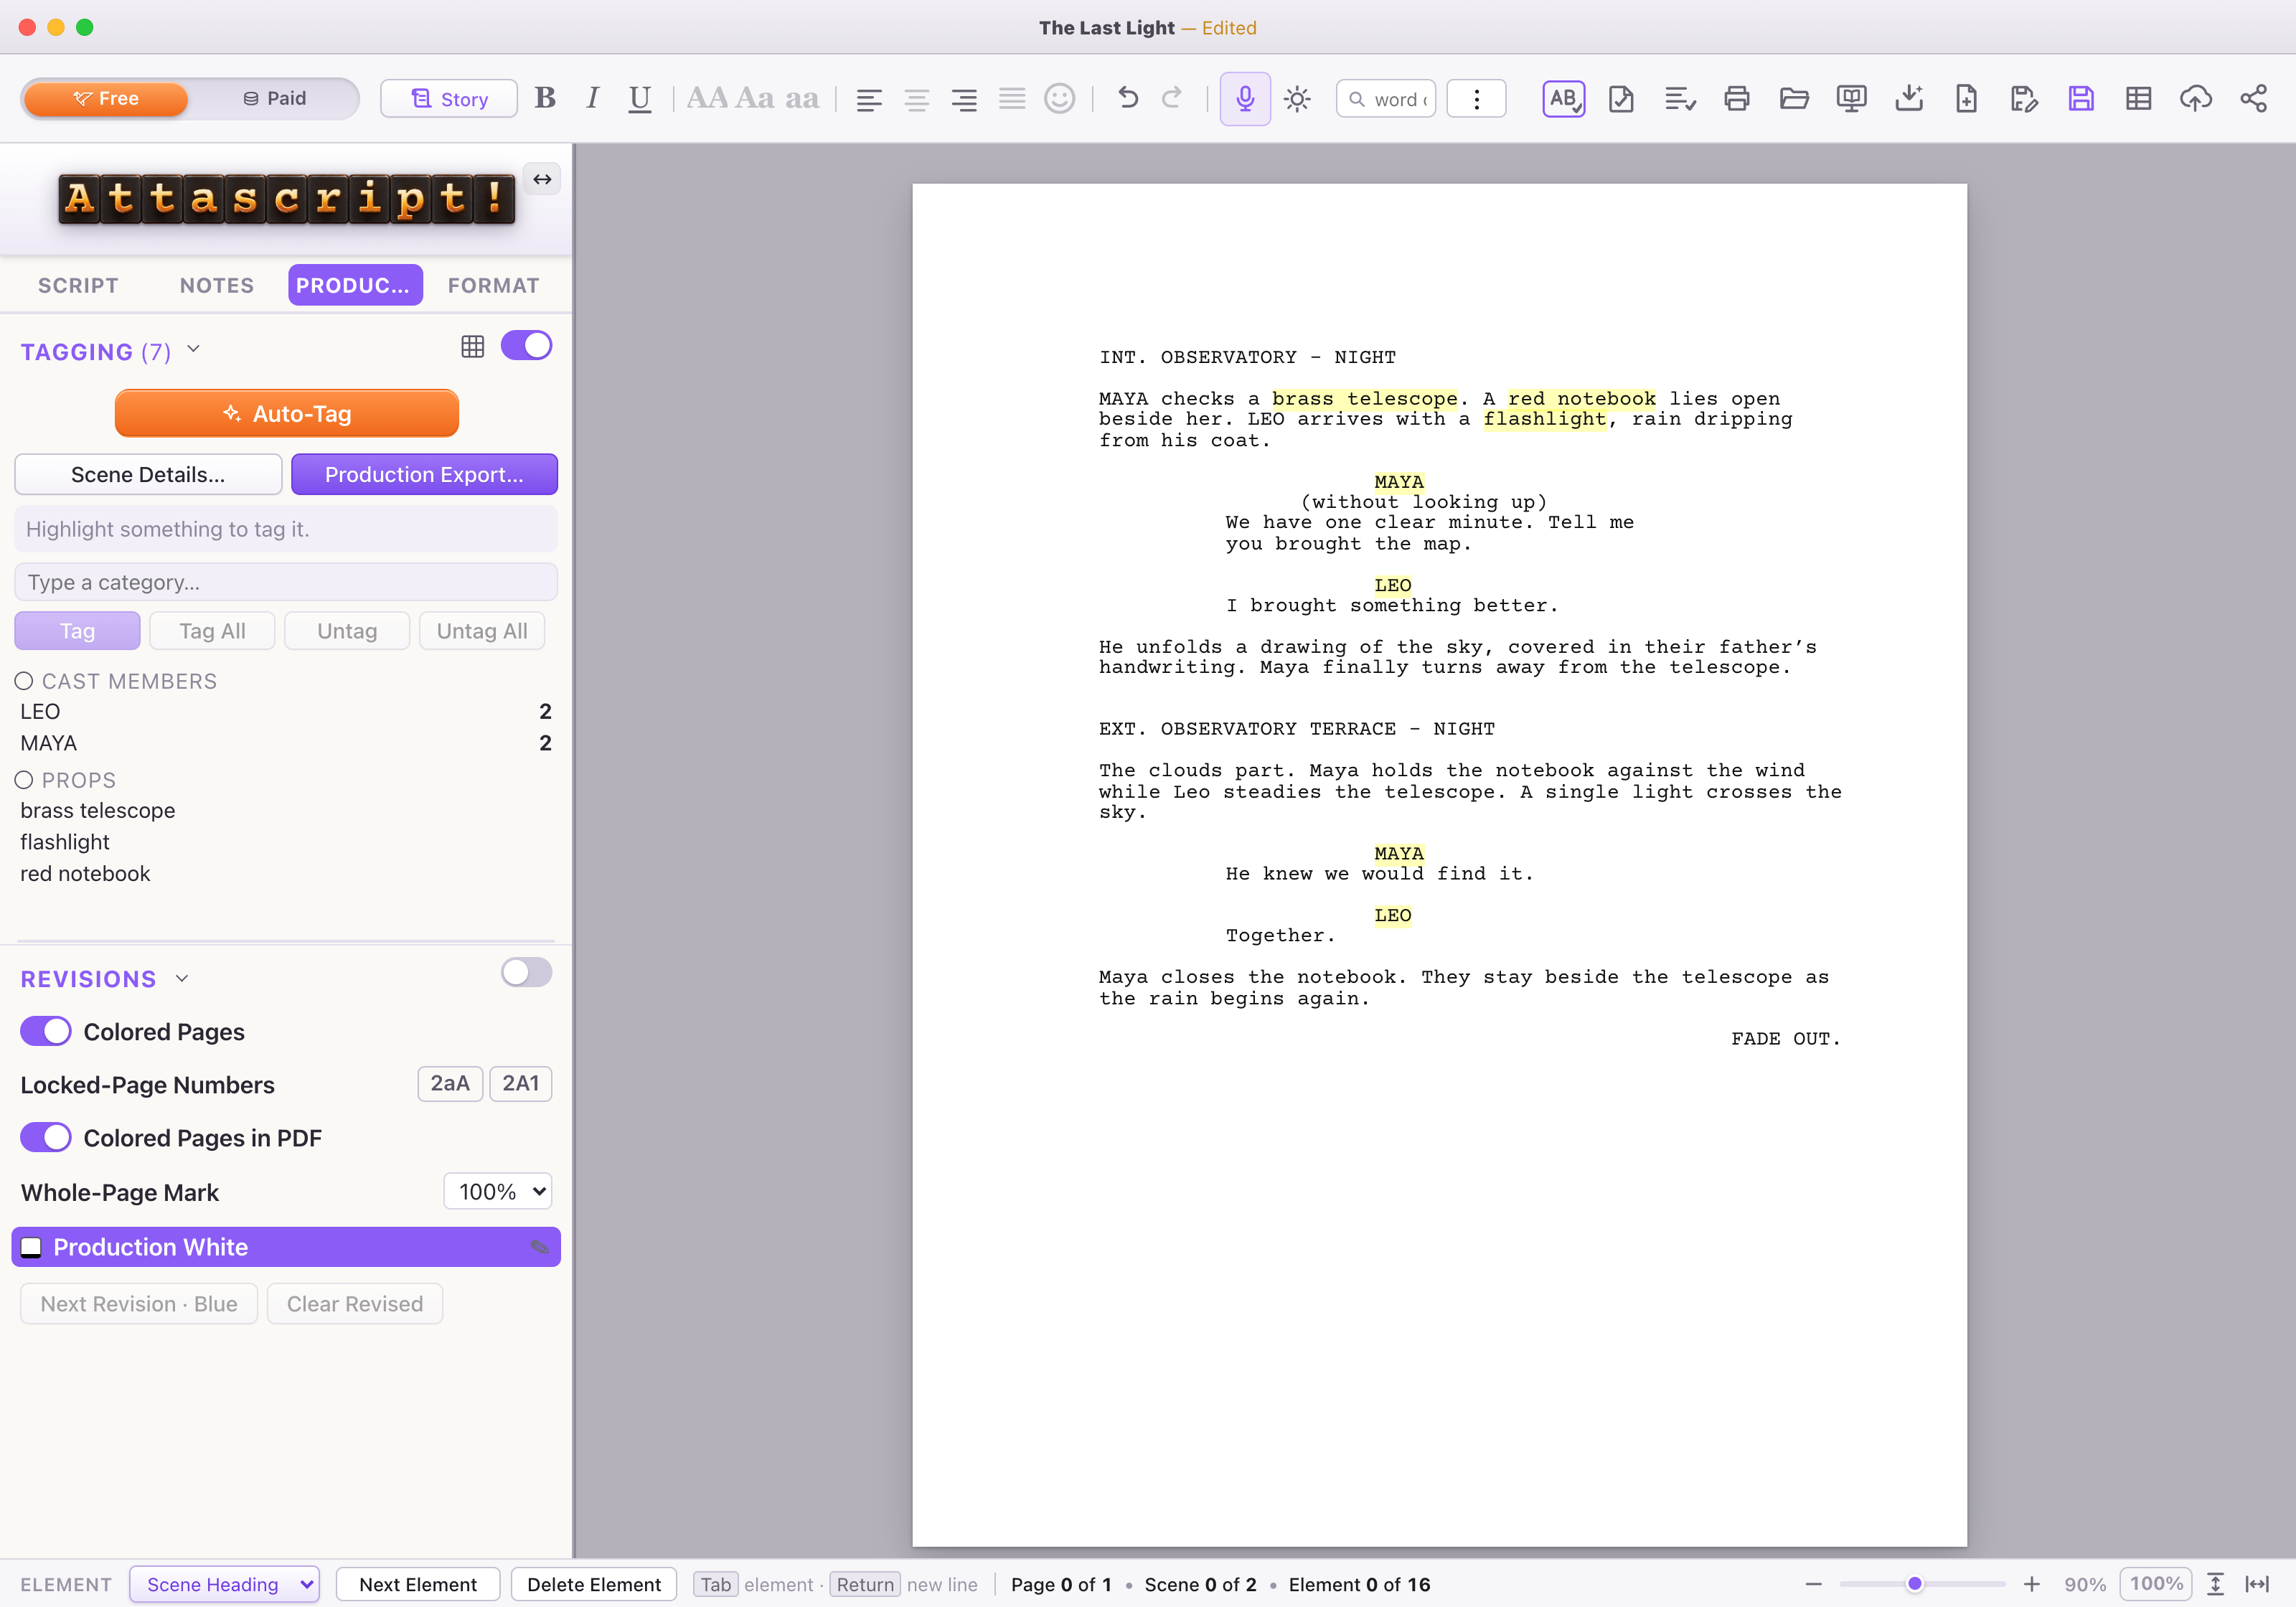
The orange or teal Auto-Tag button is a separate Gemini operation. It reads action lines for categories such as Props, Wardrobe and Animals. For The Last Light, you would expect to review the telescope, notebook and flashlight as possible Props. Do not treat every proposed label as final.
Tag and correct by hand
- Select the words you want to tag in the screenplay, such as
red notebook
. - Choose the category in the Tagging panel, then choose Tag. Use Tag All when the matching occurrences should all have that tag.
- Review the category list and counts. Use Untag or Untag All to remove a mistaken classification.
- After Auto-Tag, inspect the resulting tags scene by scene. Correct the category or wording before exporting.
Generate CSV or an Excel workbook
- Choose the toolbar’s table icon. On Windows the File command is Export Tables (CSV / Excel)…; the Mac menu uses Export CSV….
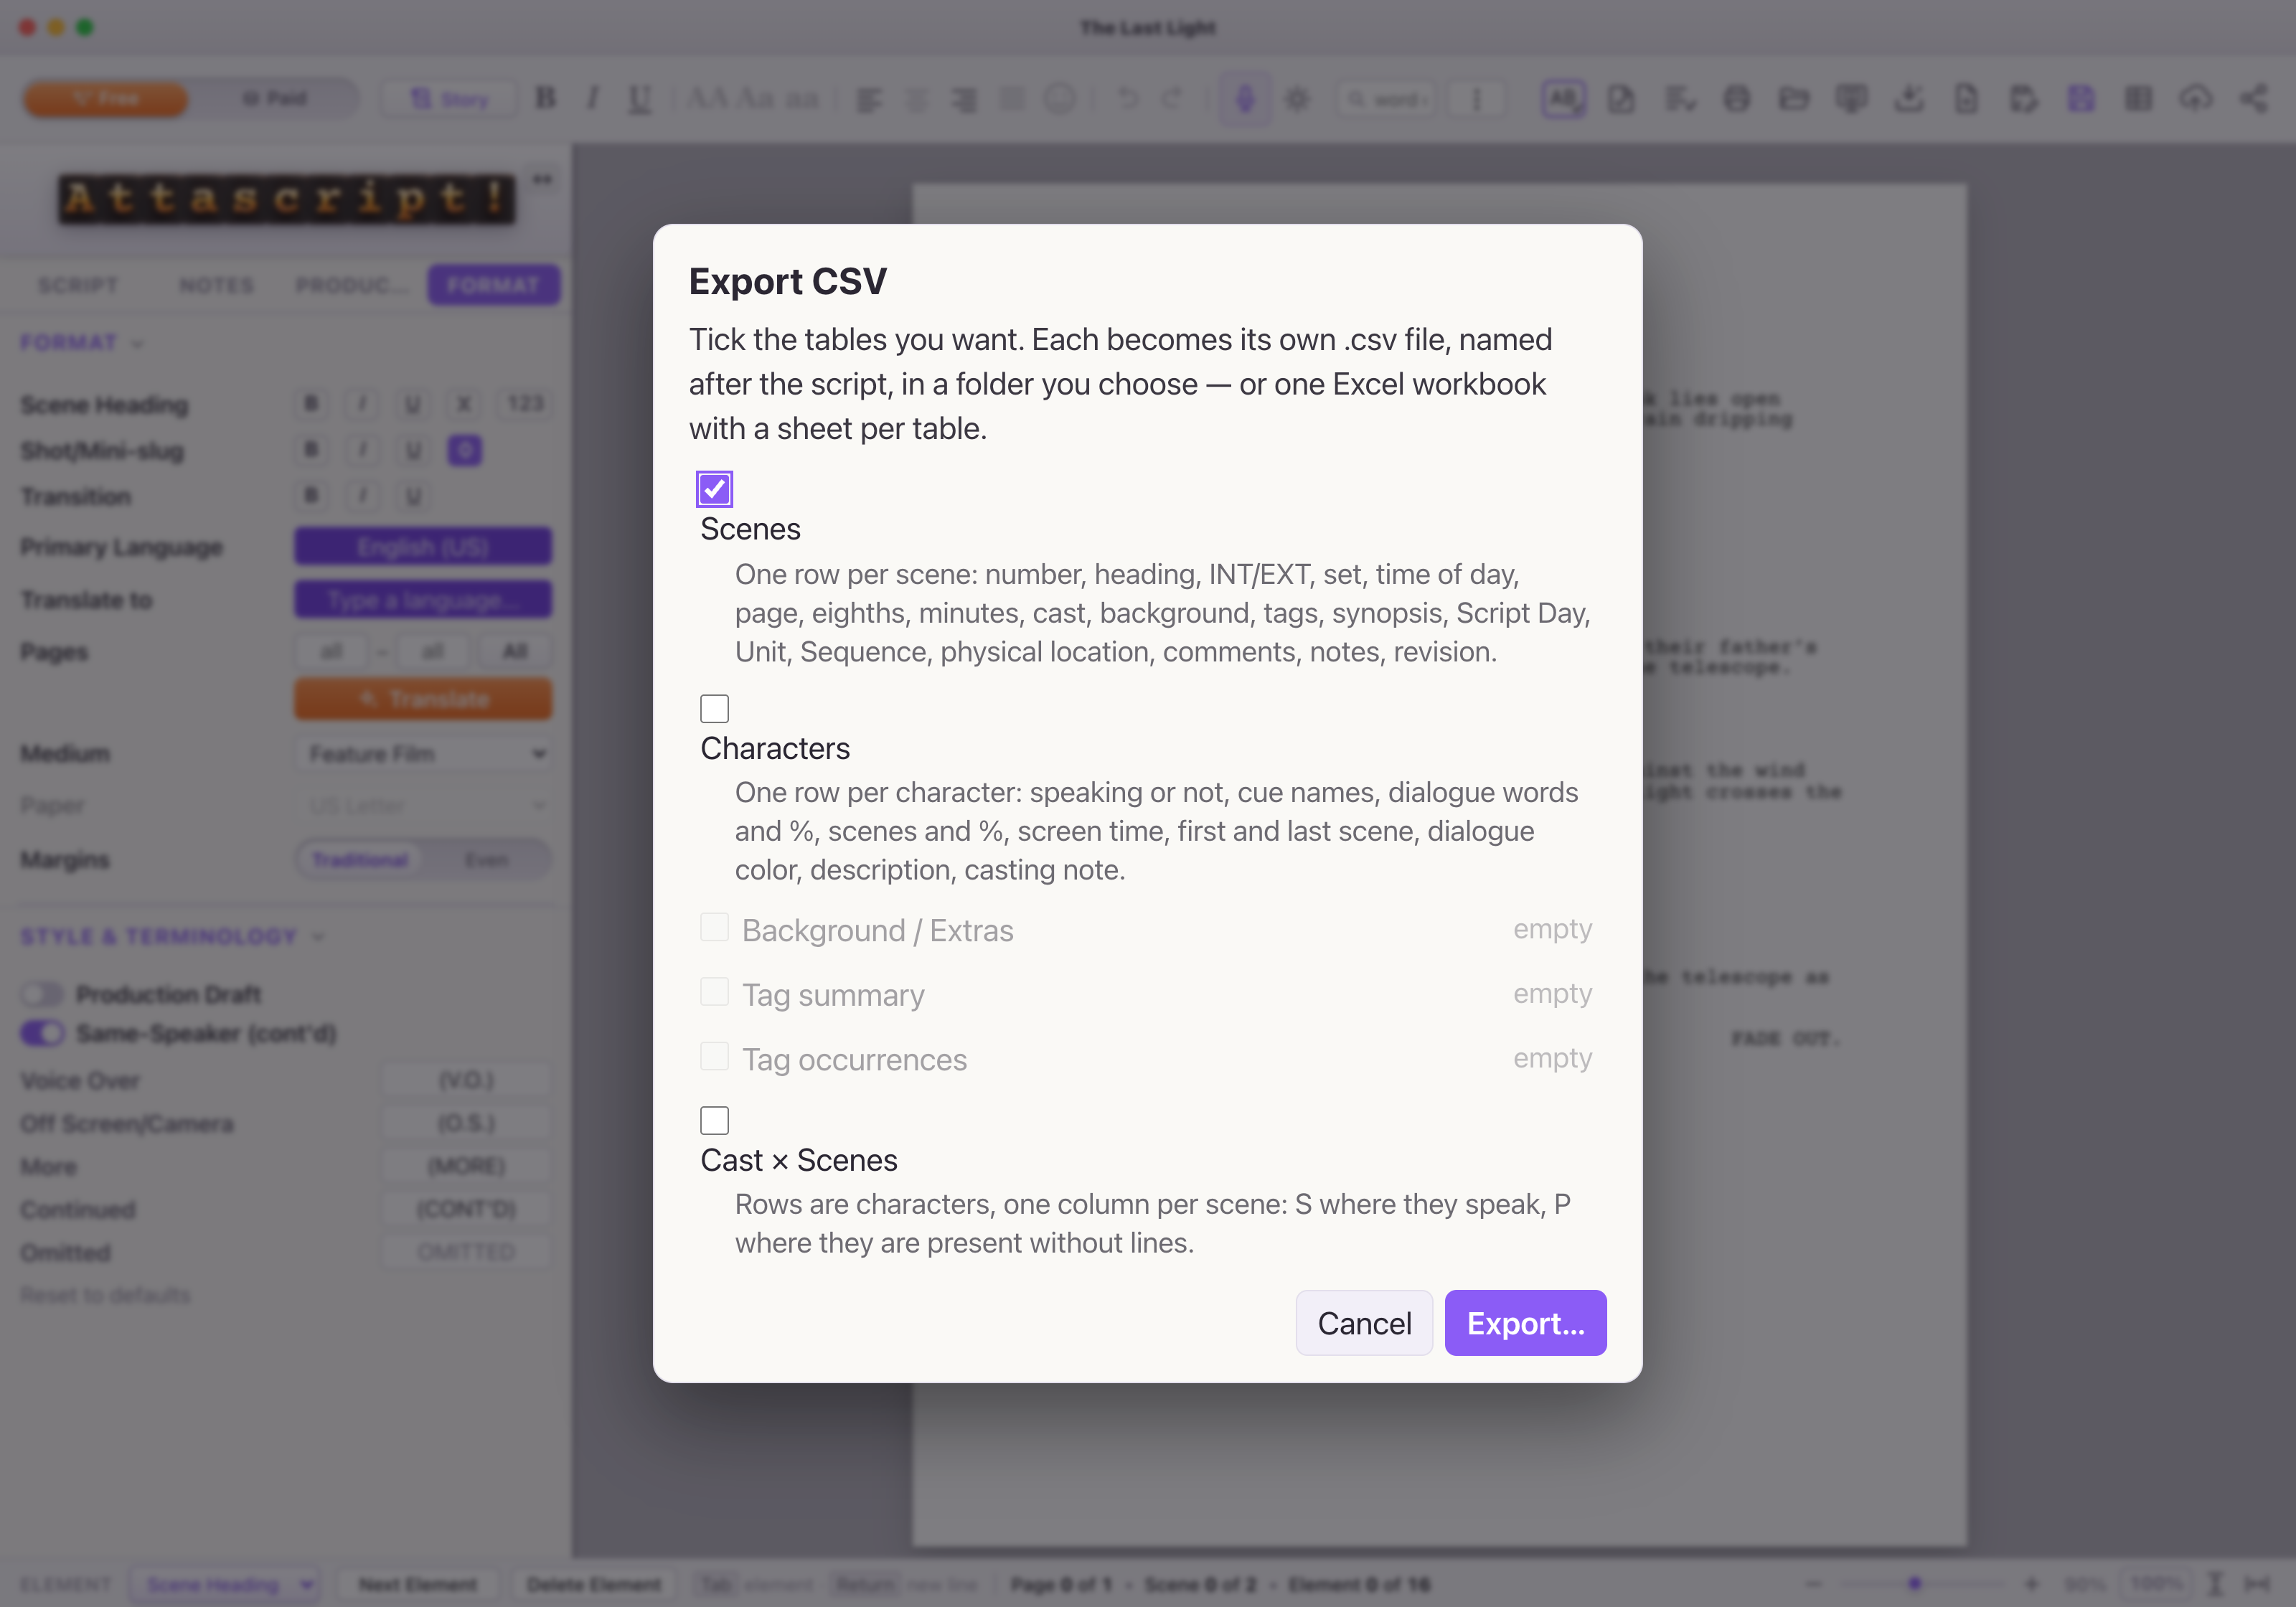
- Tick the tables you need. Empty tables are unavailable. For a first breakdown, try Scenes, Characters, Tag Summary and Tag Occurrences.
- Leave Choose the columns of each table off to include all columns, or enable it to select columns in the next step.
- Choose separate CSV files, or tick One Excel workbook (.xlsx) for one file with a sheet per table.
- Choose Export and the destination. Open the output in your spreadsheet app and check a known scene and prop count.
The twelve report tables
| Table | Useful for |
|---|---|
| Scenes | Headings, page/eighths, cast, tags and scene planning details. |
| Characters | Dialogue, scene participation, descriptions and casting notes. |
| Background / Extras | Background types and scene counts. |
| Tag summary | Totals and scene coverage for each tag. |
| Tag occurrences | Each tagged passage, with scene, page and category. |
| Cast × Scenes | A scene-by-scene speaking / present matrix. |
| Locations | Place and time variants, references and production notes. |
| Notes | Notes with scene, page and review pile. |
| Beat sheet | Beats, summaries and script positions. |
| Dialogue | Speeches, speakers and parentheticals. |
| Script lines | Every screenplay element as a row. |
| Revisions | Revised elements and revision-set information. |
CSV headers are English; the writing itself retains its characters. Image cells are deliberately excluded from these spreadsheets. Use the Story document exports when you want a report with images.
When a draft enters production
The Production tab also holds revision and numbering controls. Work on a saved copy before locking scene or page numbers. In a locked script, omitting a scene preserves its production number; it is different from deleting an unlocked draft scene. Agree a revision workflow with the production team before sending files.